Total Pageviews

Search This Blog

Translate

Showing posts with label Beef. Show all posts

Monday, 12 September 2016

Beef Pot Pie

Beef Pot Pie


I didn't know the difference between Beef Pot Pie and a Beef Pie.  That was until I googled it.  Then when you think about it.  Beef Pie, is just that.  

It's... Beef, in a pie.

Beef Pot Pie however, has both a top and bottom crust.  It has veggies and gravy.  So today, I am making a Beef Pot Pie.

Ingredients

Beef - I used cut up roast beef, but you could also use fried ground beef
4 or 5 potatoes, boiled and diced
1 bag of diced carrots and peas
1/2 cup flour
1/2 cup butter
1 box of beef broth
Pie crust

Stuff you will need

1 pot to boil the potatoes and make the gravy
1 9 x 14 baking dish
Rolling pin

Directions

OK, so I have used a couple different items in this pie.

For the crust, I have used a double deep dish crust and for the top, just a single, to see the pie crust recipe, see my page at: http://cookwithmitch.blogspot.ca/2016/08/classic-crisco-pie-crust.html

Once the pie crust is made, put it in the fridge to cool.

For the gravy, vice making chicken gravy like the food blog says, use beef broth and you will be making a beef gravy.  So my other page at: http://cookwithmitch.blogspot.ca/2016/08/chicken-gravy.html

I peeled, diced and boiled the potatoes. Drained them and kept them aside.

Pre-heat your oven to 375 F.

I made the gravy.  Then added the beef and potatoes.  I mixed that together and put that aside.

I took the pie crust out of the fridge, rolled it out and put it into the baking dish.  Put in the gravy, beef and potatoes.  I put a top layer of diced carrots and peas.  Depending on how much room you have in your pie, will depend on how much of this you add.  

Put your top layer pie crust.  Pinch the edges and put cuts in the top crust so that steam will be able to escape.
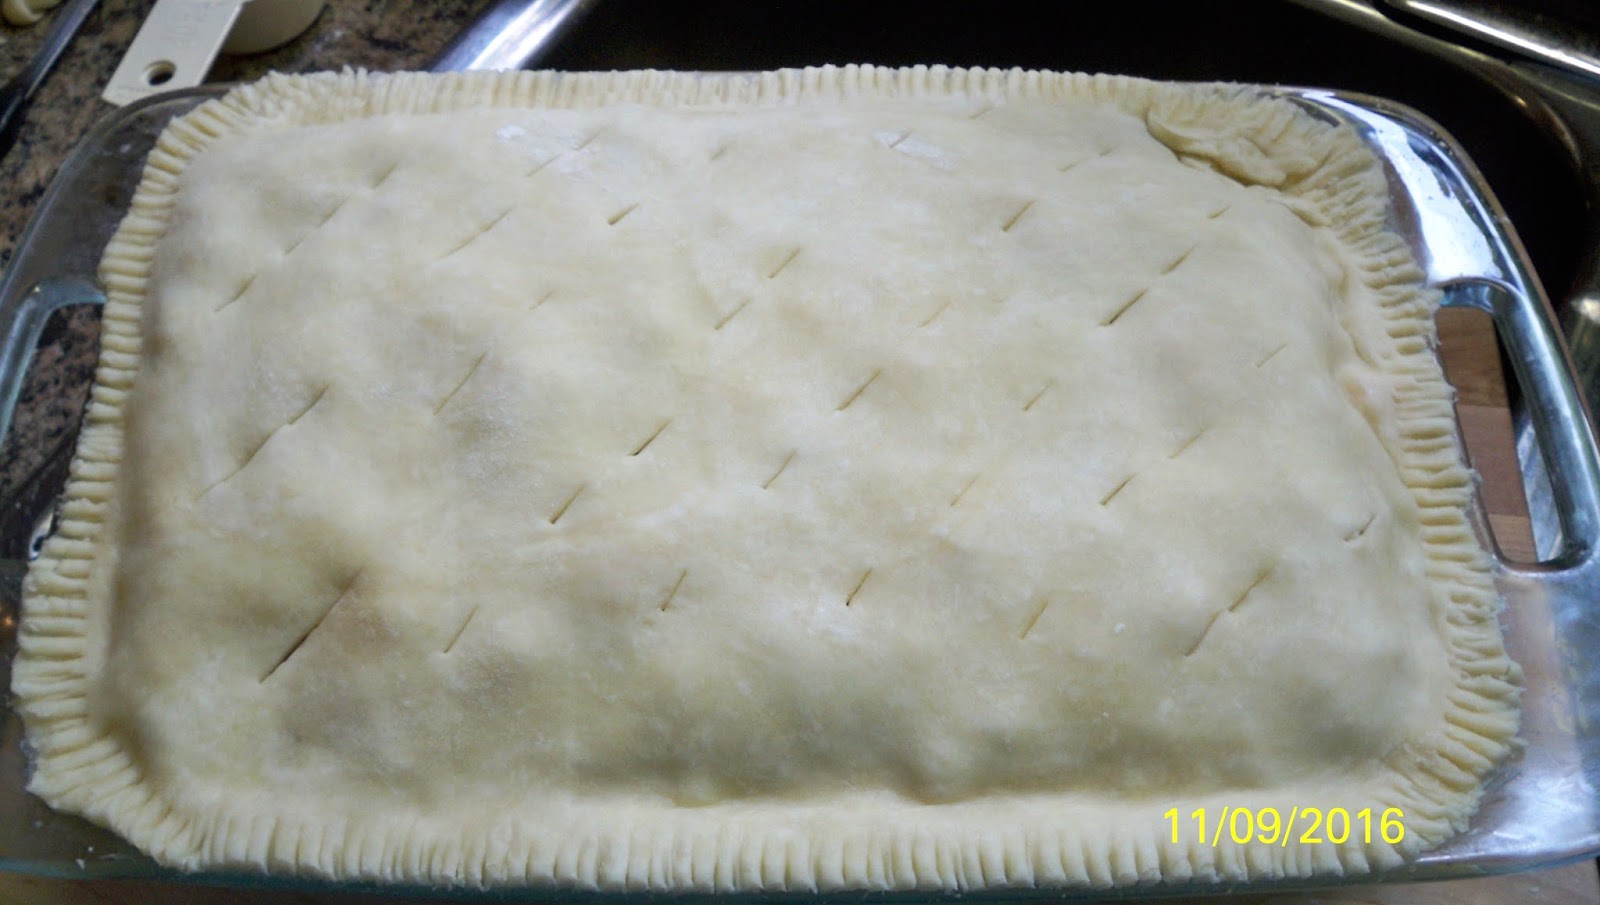

Into the oven for an hour.  As you can see by this picture, there was a edge that wasn't closed so well, so I used extra crust to close it in.  Like I always say, I am a cooking enthusiast, not a chef.

After an hour, your pie will look like this:


Server warm.  We used a bowl so that none of the gravy was lost and ate it with a spoon.


Did you like the video?  Give it a thumbs up and subscribe.

As always, comments and suggestions are ALWAYS welcome.

Sunday, 11 September 2016

Southern Beef Stew

Southern Beef Stew

This one pot wonder is GREAT!  Very tasty.  
Comfort food on those cold rainy days.

Start with the beef.  Brown it all up.

Cut up your veggies

The broth smells oh so good.


Ingredients

3 tablespoons all-purpose flour
2 pounds beef stew meat, trimmed
1/2 stick butter
2 cups water
1 cup black coffee
1 teaspoon dried thyme
2 teaspoons salt
1 teaspoon black pepper
6 potatoes, peeled and quartered
6 carrots, cut into large chunks
3 onions, quartered

Stuff you will need

1 large dutch oven
1 cutting board
1 sharp knife
1 potatoe peeler - unless your really good with a knife and want to peel the potatoes and carrots that way.  Work smarter, not harder.
Soup ladel

Directions

Place flour in a shallow dish; add beef chunks and coat completely with flour. In a dutch oven, melt butter over medium-high heat and cook beef 8 to 10 minutes, turning to brown all sides. 

Add water, coffee, thyme, salt, and pepper; mix well and bring to a boil. Reduce heat to low, cover, and simmer 1 hour. 

Add remaining ingredients and simmer 50 to 60 minutes, or until beef and vegetables are tender, stirring occasionally.

This stew would go great with a Tea Biscuit.  See my Tea Biscuit recipe:  http://cookwithmitch.blogspot.ca/2016/08/raisin-tea-biscuits.html

Comments and suggestions are ALWAYS welcome.

Wednesday, 24 August 2016

Salisbury Steak with Ground Beef

Salisbury Steak Recipe


Another one of my "Comfort Food" recipes.  Did you know you can search by key words?  If you type in "Comfort Food" in the search banner, all the recipes labeled that way will appear in the search.

I used my Kitchenaid Food Processor.  Doesn't this make life great.  Also used my 5 quart Cast Iron Dutch Oven.

Ingredients

1 pound of Ground Round Beef
1/2 teaspoon of Black Pepper
1 teaspoon of Salt
1/2 teaspoon of Garlic Powder
1 teaspoon of Worcestershire Sauce
1 whole Egg
1/4 cup of dry Bread Crumbs
2 Tablespoons of Butter
1 large Onion, sliced
2 Tablespoons of Flour
2 cups of Water
2 teaspoons of Beef Bouillon Granules

Stuff you will need

Heavy Pot with Lid
Mixing bowl

Instructions

In a mixing bowl, combine the Beef, Black Pepper, Salt, Garlic Powder, Worcestershire Sauce, Bread Crumbs and one whole Egg. Stir mixture together well.

Shape into 4 equal sized patties.

Heat a skillet over medium heat for about a minute, and then add Butter.

Place meat patties in skillet and brown on both sides for about 4-5 minutes each. Remove from skillet and set aside.

Add the sliced Onion into the skillet, right on top of the browned bits.

Reduce the heat and cook the onions on medium-low heat until the onions turn translucent and brown. Don't rush this step. Cook the onions low and slow for about 20-25 minutes.

Sprinkle 2 Tablespoons of flour over the onions. Stir. Let cook and brown for about 2 minutes.

Add 2 cups of cold Water. Stir well. Raise the heat back up to about medium.

Add 2 teaspoons of Beef Bouillon Granules. Stir Well.

Place the meat patties back in the pan. Cover. Reduce heat just a little and let simmer for about 15 more minutes. Remove from heat and serve warm.

Here is the video I made.  If you click on the "YouTube" link in the video, it will redirect you to the YouTube site where you can make the video full screen.


Did you enjoy the video?  Please click "Subscribe" and give it a "Thumbs Up".  Remember to share with your friends.

Comments and suggestions are ALWAYS welcome.

Sunday, 21 August 2016

Mum's Macaroni - some people call it "Goulash"

Mum's Macaroni - some people call it "Goulash"


This is another recipe that comes from home.  We all have our favorite cooks.  I call mine "Mum".  This is a variation of her recipe as she makes it just a little differently than what I did here.

Ingredients

1 pound elbow macaroni
1 pound ground beef
1 onion diced
1 large can of stewed tomatoes 
Pepper to taste
2 tablespoons butter
1/2 teaspoon salt
1 tablespoon oil

Stuff you will need

1 large pot to cook the macaroni
1 collander (strainer)
1 large skillet
1 oven safe casserole dish (Optional)

Directions

Add water, salt and oil to the one pot to boil the macaroni.  I only use medium heat.  Saves electricity and if you think it boils the water any faster, well, I am sure your right, but not that much faster.  Once the water is boiling, add the macaroni and turn the heat off.  Cover and let sit for 20 minutes.  The macaroni will cook in the pot while the heat is off.  The nice part about this, NO boil over.

Fry the onions and pepper in butter till they are translucent.  I have never timed it, but about 5 minutes, perhaps a little more.  Do you like pepper?  Then add a lot.  Don't like a lot of pepper, then don't add a lot.

Once the onions are done, add the hamburger.  In the video, I am sure it's more than 1 pound of ground beef that I have added.  Fry up the beef till browned.

Drain the ground beef and add it back to the skillet.  Add the stewed tomatoes.

Drain the cooked macaroni and add that to the skillet.  Mix it all up and you got "Goulash".

To get "Mum's Macaroni", put the Goulash into an oven safe casserole dish and into the oven for 30 to 40 minutes at 350 F.  This will brown the top of the casserole.


I like adding extra salt to this before I eat it.  Not too much though, the Doctor said I have high blood pressure and should avoid salt.

Comments and suggestions are ALWAYS welcome.

Tuesday, 16 August 2016

High Mountain Beef Jerky Gun

High Mountain Beef Jerky Gun

This beef jerky is SO easy to make

Get up early and put the coffee on

Yesterday you took a pound of hamburger out to thaw.
Added the High Mountain Beef Jerky spices according to the directions

Load up your Beef Jerky Gun

Just like spreading calking, squeeze out your strips

Round and round you go

Just keep loading the trays

I don't know how many times I had to reload

Plug in the dehydrator for about 12 hours

Nice little snack.  Kept mine in the fridge.  Didn't last more than 3 weeks before it was all ate.

My parents bought me this beef jerky gun, Christmas of 2011.  I have been able to locate the spices at Princess Auto.  There are two store locations that I know of:
Halifax, Nova Scotia
Moncton, New Brunswick

There are variations on the gun.  I seen one that has a tip that will squeeze out two strips at the same time.  I bet that's a time saver.  I seen some that are all metal.  But I like this one as you can see when the tube is getting empty.

Once you are done dehydrating the beef jerky, I rolled them out on a paper towel to remove any excess fat and grease that was on the outside of the beef jerky.

One time, I got a hold of 2 moose steaks.  I trimmed off all the fat, and run it through the meat grinder attachment that I have for my Kitchenaid.  Then I added the spices.  It tasted like beef jerky to me.  If there was a "moose" taste, I couldn't taste it.

I made a batch for my brother-in-law.  He ate the entire batch in one sitting.  He just LOVED it.

As always, comments and suggestions are always welcome.

Friday, 5 August 2016

Smoked Beef Brisket

Smoked Beef Brisket


If you don't have a smoker, I recommend you make friends with someone that does

I put in my Brisket about 4 hours ago.  There is a pan of home made baked beans under the brisket to catch the drippings.  That recipe will be another day.

You may not think that 200 F is hot.  But I learnt really quick.  IT IS HOT!  I am using the spoon to pull the baked beans out.

I ladle up a helping

Of course I only get enough for 1 serving

Back into the smoker it goes

Smells great

Tastes great too

Sorry for eating in front of you

The beans are DONE

Just the brisket is left inside

Gonna have a lot of beans

The "money" shot

The "secret" ingredient


Not a lot, just enough to make the beans wetter

Stir it in

Stir some more

Cover to keep warm

It's been about 6 hours

Notice my "Shark Glove"

More apple juice on the brisket

Don't pour too much, you don't want to drown it

It's been about 12 hours now

Trying to take the tin foil off.

It LOOKS ruined.  Mum and Tonya were not happy.


I didn't spice up the brisket a lot before it went into the smoker.  Salt, pepper, garlic and onion powder.

The smoker was set to about 225, that's it's MAX setting.  I started the smoker about 4 in the morning when everyone was sleeping.  We had the brisket for supper.  I know we had rolls as I got a picture of them.  We also had Nutella Cheese Cake too.  Again, another blog for those recipes.


Smoked Beef Brisket

Ingredients

1 x beef brisket, they range from 8 pound to 15 pounds
Salt, pepper, garlic and onion powder - to taste, no right or wrong amount, it's your preference

Directions

Heat up the smoker about 20 minute

Now, I had made home made baked beans and put that in the smoker to catch the drippings from the beef brisket.  You want to bet, this adds a killer ingredient to those beans.

Depending on the size of the brisket, you may need to cut it in half to fit in the smoker.  Unless you got a massive smoker.  I got a Bradley smoker that Mum & Dad bought for my 50th birthday.  Available at Canadian Tire.  Check out the link if you wanted one ==> CLICK HERE <==

Don't got a smoker.  Hey, you know someone that does.  ME!  I am off on the weekends if ever you wanted to smoke a brisket.

I used apple wood to smoke the brisket.  The "pucks" are also at Canadian Tire.  Lots of variety.

After about 4 hours, I took the beans out cause they were done.  I took the brisket out of the smoker and laid down some tin foil.  Not that cheap stuff that you can get at the Dollar Store, but the HEAVY DUTY stuff.  Extra wide and thick too.  I added about a cup of apple juice to the brisket, wrapped it up and back into the smoker.

After about 12 hours, I took it out and unwrapped it.

Have a look at the video:


We sure did eat well!  It was confirmed...  the meat wasn't ruined after all.

As always, comments and suggestions are ALWAYS welcome!

Wednesday, 3 August 2016

Beef Stew with Tea Biscuit

Beef Stew with Tea Biscuit


I made this stew and posted it on the Cast Iron Cooking Facebook page.  I know it was a good hearted jab, but they said that my beef stew came out of a can.  This is to prove that it didn't.

The Tea Biscuit will be another video

Ingredients

1 1/2 pounds of steak
2 onions
4 carrots
4 potatoes
2 stalks celery (optional)
1/2 cup of red wine (optional)
1 tablespoon chopped garlic
1 teaspoon black pepper
1 teaspoon rosemary
2 bay leaves
1/2 teaspoon salt
2 tablespoons of Beef Concentrate
1/3 cup flour
3 to 4 cups of cold water

Directions

Heat up your Dutch Oven
Add the steak, spices and butter, cook for about 10 minutes
Add the chopped up onions, garlic, red wine and beef concentrate
Reduce heat, cover and cook for approx 2 hours
Steam your potatoes and carrots for about 20 to 25 minutes
Remove the cover and turn the heat up to 1/2 and add flour.
Constantly stir for 5 minutes so that the flour taste is gone
Add cold water, about 1 cup at a time, stir to incorporate
Once your gravy is the desired consistency, add the carrots and potatoes

Serve with Tea Biscuit


If you like this video, please click on the "YouTube" icon.  When you are viewing the video in YouTube, please subscribe and like my video there.

As always, comments and suggestions are ALWAYS welcome.