Total Pageviews

Search This Blog

Translate

Showing posts with label Pie. Show all posts

Monday, 12 September 2016

Beef Pot Pie

Beef Pot Pie


I didn't know the difference between Beef Pot Pie and a Beef Pie.  That was until I googled it.  Then when you think about it.  Beef Pie, is just that.  

It's... Beef, in a pie.

Beef Pot Pie however, has both a top and bottom crust.  It has veggies and gravy.  So today, I am making a Beef Pot Pie.

Ingredients

Beef - I used cut up roast beef, but you could also use fried ground beef
4 or 5 potatoes, boiled and diced
1 bag of diced carrots and peas
1/2 cup flour
1/2 cup butter
1 box of beef broth
Pie crust

Stuff you will need

1 pot to boil the potatoes and make the gravy
1 9 x 14 baking dish
Rolling pin

Directions

OK, so I have used a couple different items in this pie.

For the crust, I have used a double deep dish crust and for the top, just a single, to see the pie crust recipe, see my page at: http://cookwithmitch.blogspot.ca/2016/08/classic-crisco-pie-crust.html

Once the pie crust is made, put it in the fridge to cool.

For the gravy, vice making chicken gravy like the food blog says, use beef broth and you will be making a beef gravy.  So my other page at: http://cookwithmitch.blogspot.ca/2016/08/chicken-gravy.html

I peeled, diced and boiled the potatoes. Drained them and kept them aside.

Pre-heat your oven to 375 F.

I made the gravy.  Then added the beef and potatoes.  I mixed that together and put that aside.

I took the pie crust out of the fridge, rolled it out and put it into the baking dish.  Put in the gravy, beef and potatoes.  I put a top layer of diced carrots and peas.  Depending on how much room you have in your pie, will depend on how much of this you add.  

Put your top layer pie crust.  Pinch the edges and put cuts in the top crust so that steam will be able to escape.


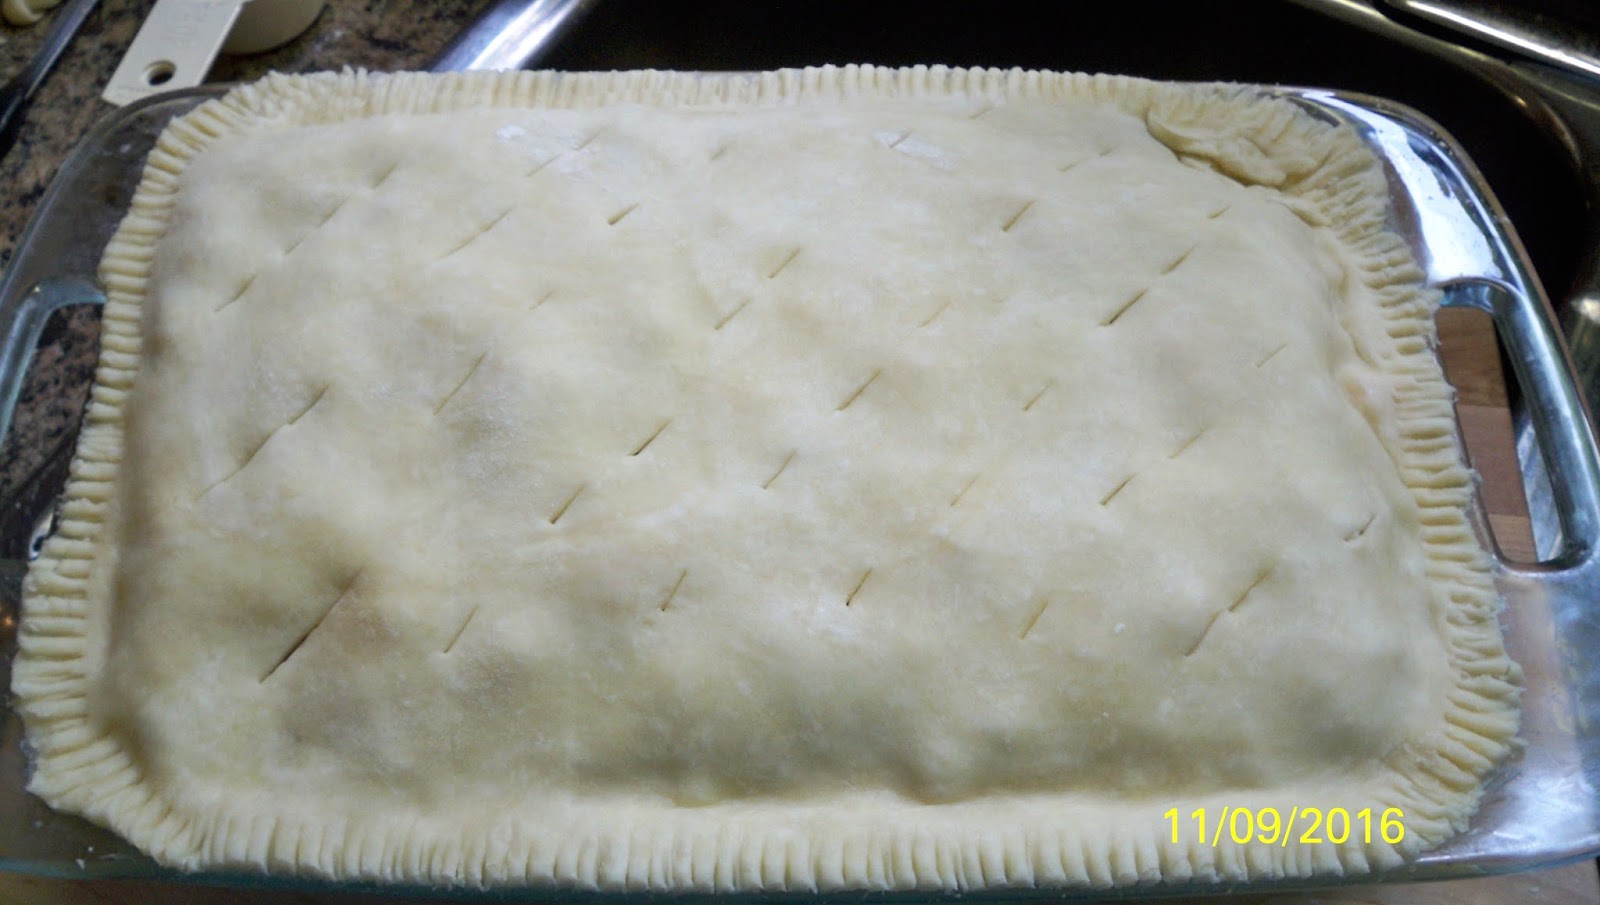
Into the oven for an hour.  As you can see by this picture, there was a edge that wasn't closed so well, so I used extra crust to close it in.  Like I always say, I am a cooking enthusiast, not a chef.

After an hour, your pie will look like this:


Server warm.  We used a bowl so that none of the gravy was lost and ate it with a spoon.


Did you like the video?  Give it a thumbs up and subscribe.

As always, comments and suggestions are ALWAYS welcome.

Wednesday, 17 August 2016

Classic Crisco® Pie Crust

Classic Crisco® Pie Crust


INGREDIENTS:

SINGLE CRUST

1 1/3 cups All Purpose Flour
1/2 teaspoon salt
1/2 stick well-chilled Crisco® Baking Sticks All-Vegetable Shortening
OR 1/2 cup well-chilled Crisco® All-Vegetable Shortening
3 to 6 tablespoons ice cold water

DOUBLE CRUST

2 cups All Purpose Flour
1 teaspoon salt
3/4 stick well-chilled Crisco® Baking Sticks All-Vegetable Shortening
OR 3/4 cup well-chilled Crisco® All-Vegetable Shortening
4 to 8 tablespoons ice cold water

DEEP DISH DOUBLE CRUST

2 2/3 cups All Purpose Flour
1 teaspoon salt
1 stick well-chilled Crisco® Baking Sticks All-Vegetable Shortening
OR 1 cup well-chilled Crisco® All-Vegetable Shortening
6 to 10 tablespoons ice cold water

DIRECTIONS:
1.
 BLEND flour and salt in large bowl. Cut shortening into flour mixture using pastry blender or fork. Stir in just enough water with fork until dough holds together.


TIP
 Test dough for proper moistness by squeezing a marble-sized ball of dough in your hand. If it holds together firmly, do not add any additional water. If the dough crumbles, add more water by the tablespoonful, until dough is moist enough to form a smooth ball when pressed together.


2.  SHAPE dough into a ball for single pie crust. Divide dough in two for double crust. Flatten ball(s) into 1/2-inch thick round disk(s).

TIP
  For ease in rolling, wrap dough in plastic wrap. Chill for 30 minutes or up to 2 days.


3.  ROLL dough (larger ball of dough for double crust pie) from center outward into a circle 2-inches wider than pie plate on lightly floured surface for the bottom crust. Transfer dough to pie plate.


4.
 For a SINGLE pie crust, trim edges of dough leaving a 3/4-inch overhang. Fold edge under. Flute dough as desired. Bake according to specific recipe directions.


5.
 For a DOUBLE pie crust, roll disk for bottom crust, trimming edges of dough even with outer edge of pie plate. Fill unbaked pie crust according to recipe directions. Roll out remaining dough disk. Transfer dough carefully onto filled pie. Trim edges of dough leaving a 3/4-inch overhang. Fold top edge under bottom crust. Press edges together to seal and flute as desired. Cut slits in top crust or prick with fork to vent steam. Bake according to specific recipe directions.

 
Pre-baking Pie Crusts (Cream Pies)


Thoroughly prick bottom and sides of unbaked pie dough with fork. Bake crust in lower third of oven, at 425°F, 10 to 12 minutes or until edges and bottom are golden brown.


So once again, I have proven that I can follow a recipe.  For those of you that always buy their pie crust from the store, that's OK.  Doing pastry isn't for everyone.  But so far, everyone has said that my pasty is really good.  Flaky and bakes up, really nicely.

Comments and suggestions are ALWAYS welcome

Lemon Meringue Pie

Lemon Meringue Pie

Today I will be making Lemon Meringue Pie, from a box

I am not too shy to admit, making a lemon meringue pie from scratch can be done.
Buy why put yourself though that?  Buy the box.  Cheat a little.  Who is going to know?

So you need a good pastry recipe and I just happen to have one

Making the pastry...

Adding stuff

Using the pastry cutter, la la la as I sing while I work

Roll out the pastry

Mum took pics of the pastry recipe

Mum is giving away my secrets

Roll the pastry around the rolling pin and drop it into the pie pan

Press it into the pic pan

Insert more singing

Making sure the edges are good

Prick the bottom s that you don't get a pastry bubble when baking

The dollar store egg seperator

Whites go here, yolks go over there

I can tell that I used 4 eggs

I got the proper amount of water from the tap

Added the contents of the bag to the water and the eggs yolks

Flicking the bag to get all the powder

Stiring

I did a good job.  Stirred it all up.

Kitchenaid with the whisk

Action shot

Another action shot

Happy that I am not whisking this by hand.

Letting the machine do it's "thing"

Pie crust is pre-baked.  Just like the box said to do.

Whisking whisking and MORE whisking

It getting to the point where it will be put on the pie

Put the contents into the pie crust.  Thankfully I was making a deep dish pie, otherwise, it wouldn't have all fit into the pie crust.

Start putting the meringue on the pie

Singing a song

Boring stuff here

Making sure the meringue gets to the sides of the pie

Into the oven for the amount of time it said on the box

Pie is DONE

DO NOT TRY TO TAKE THE PIE OUT WITHOUT OVEN GLOVES

Ah, oven gloves.  Safety first.

The pie

Money shot

Cheap friggin utensils
Threw that in the garbage

The first piece is on the plate

Cutting piece # 2

A piece of pie for Mum, my photographer and one for me


OK, so this post only proved that I can follow a recipe on the back of a box.

For the purists out there, you can make your pie from scratch.  The box is 100% success each and every time.

I will be posting my pie crust recipe in the next blog.  Stay tuned.

Comments and suggestions are ALWAYS welcome.